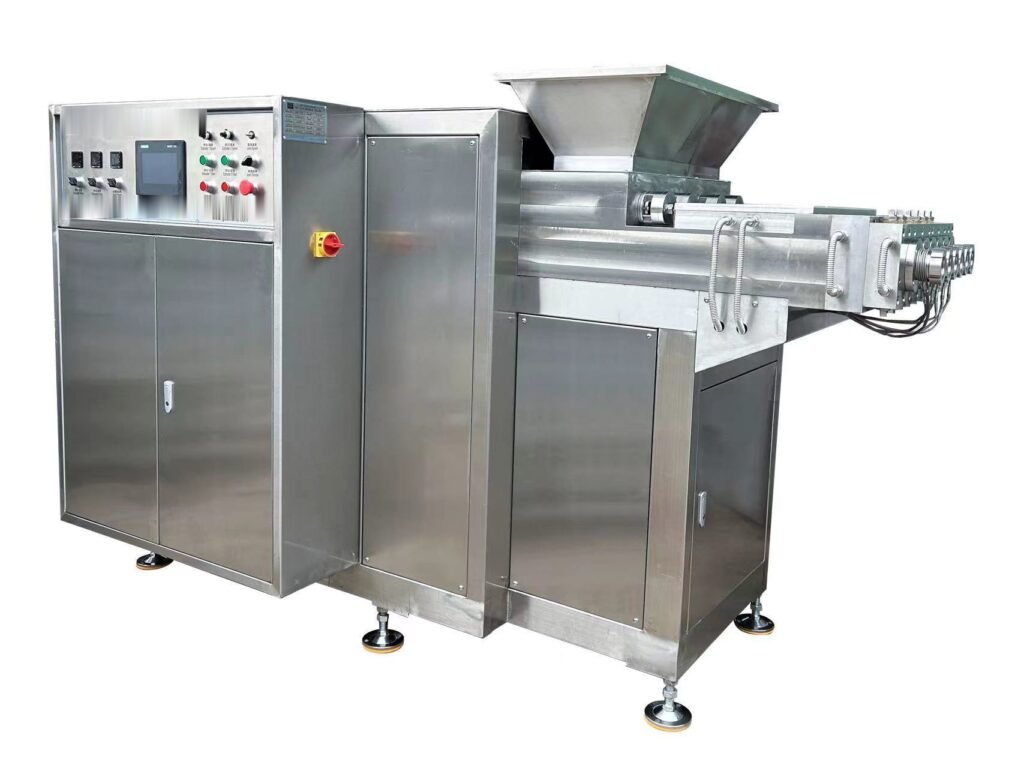
Every chewy candy has one decisive moment: the second the cooked mass is pushed through a die and comes out as a continuous rope. Get that moment right and the rest of the line — cooling, cutting, wrapping — simply follows. Get it wrong and no amount of downstream tuning will save the texture. This guide looks at the candy extruder machine itself: what each part does, how single- and double-colour heads differ, how to match a die to your product, and the handful of numbers you should settle before you sign a purchase order.
What the extruder actually decides
A candy extruder is not a simple pump. It is the place where three product properties are locked in:
- Texture — how much work the screws do on the mass, and at what temperature, sets chewiness versus snap. Over-work a liquorice mass and it turns tough; under-work a gummy and it never develops its bite.
- Piece weight — rope diameter and line speed together determine grams per piece. Both are adjustable, but only within the window the die and head were designed for.
- Shape and cross-section — round rope, flat ribbon, twisted rope, filled core or two-colour stripe all come from the die and head arrangement, not from downstream tooling.
That is why two machines with the same motor rating can behave completely differently on the same recipe. The useful specification is not kilowatts — it is head configuration, die family and the mass temperature the barrel can hold.
Anatomy of a production extruder
Strip away the stainless panels and every candy extruder has the same five functional blocks: a feed hopper, one or two jacketed barrels with screws, a die head, a rope take-off, and a control cabinet that ties temperature zones and drive speeds together.
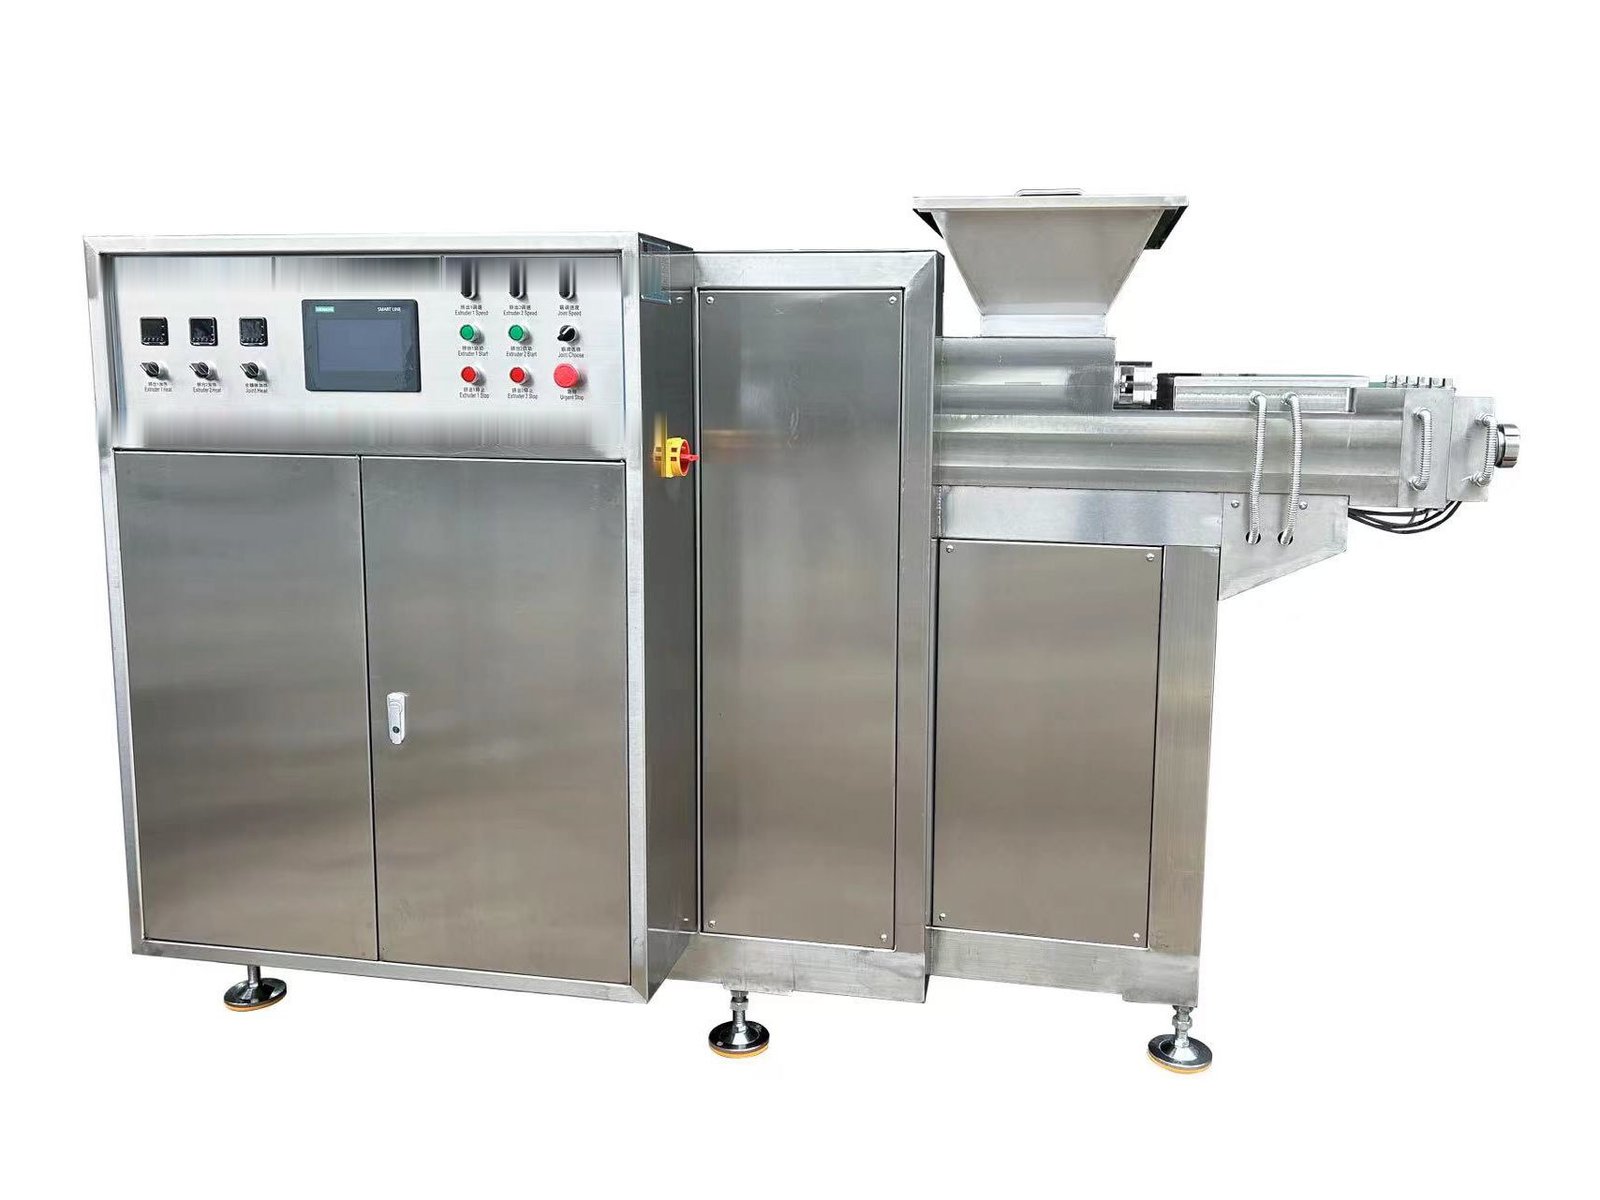
Three details separate a machine that runs well for a decade from one that fights you every shift:
- Zone-controlled jackets. The barrel should hold a stable water temperature along its length, not just at the inlet. Temperature drift of a couple of degrees is enough to change rope surface and cause sticking on the conveyor.
- Independent head drives. On a double-colour machine the two heads must be able to run at different speeds. That speed ratio is what creates a stripe width or a core-to-shell proportion; a single shared drive cannot do it.
- Tool-free die access. Dies are changed far more often than any other part. If a die swap takes an hour and a crane, operators will avoid changeovers — and your product range quietly shrinks to one SKU.
Single head or double head?
The choice is commercial before it is technical. A single-head machine is cheaper, simpler to clean and perfectly adequate for one-colour ropes, ribbons and simple shapes. A double-head machine earns its cost when you need any of the following:
| Requirement | Single head | Double head |
|---|---|---|
| One-colour ropes, ribbons, simple profiles | Best value | Usable, but paying for unused capability |
| Two-colour stripes or twisted ropes | Not possible | Core capability |
| Filled centre (liquid, paste, fondant) | Not possible | Second head feeds the centre |
| Fast SKU rotation | Die change only | Die change plus speed-ratio recipe |
| Cleaning and changeover time | Shorter | Longer — plan the routine |
If stripes account for even a quarter of your planned output, specify the double head from the start. Retrofitting a second head later usually means a new die block, new drives and a new control cabinet — close to the price of the machine.
Choosing the die: the cheapest way to widen your range
Dies are small, inexpensive and change the product more than any other component. A well-chosen die family lets one extruder cover liquorice ropes, gummy ribbons, sugar-sanded pencils and filled bars with the same barrel and the same recipe logic.
Two rules keep die selection honest. First, size the die to the rope, not to the finished sweet — shrinkage during cooling and cutting allowance both have to be built in. Second, keep the die’s internal geometry smooth and symmetrical: sharp internal corners create dead spots where mass sits and scorches between batches, and those scorched specks reappear in your finished product hours later.
For products where colour placement matters — a stripe that must stay on top, a core that must stay centred — the die is designed together with the head, not separately. This is the part of the specification where a short video call with the supplier’s engineer saves weeks of trial and error.
Sizing capacity without guesswork
Capacity conversations go wrong when they start from a brochure number. Start from pieces per minute instead, then work backwards:
- Pieces per minute required at the packing line, including rejects.
- Grams per piece for your heaviest product — heavy pieces, not light ones, set the limit.
- Rope speed follows from those two numbers and the piece length.
- Extruder size is then chosen so that the required rope speed sits comfortably inside its range, not at the top of it.
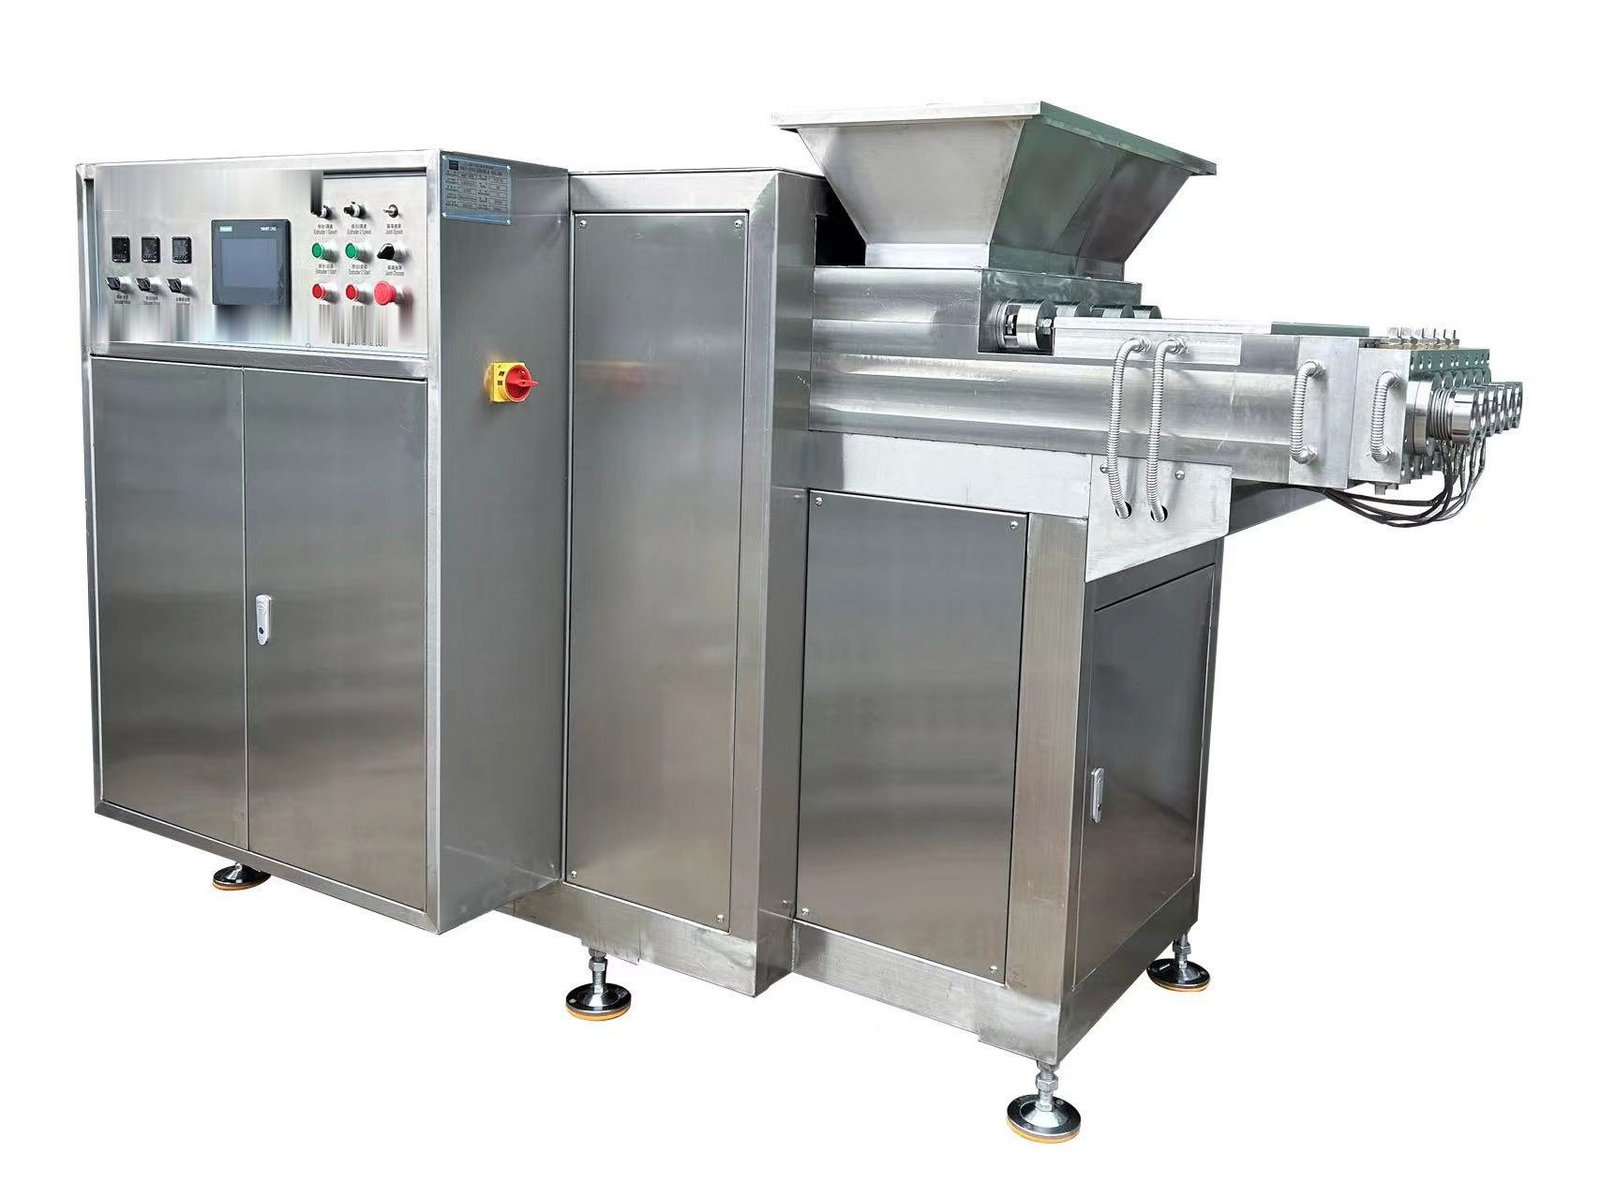
As a reference point, the extrusion section of our gummy and liquorice lines is specified from roughly 500 to 1,000 kg/h depending on rope size and product density. The compact unit below covers the lower end of that range and is the usual choice for factories starting with two or three SKUs:
Cooling and rope handling are part of the machine’s job
An extruder that produces a beautiful rope into a badly designed take-off will still ruin the product. The rope must be supported, not stretched, from the die to the cooling tunnel; any tension variation shows up later as weight scatter at the cutter. Three practical checks:
- Conveyor speed matching. The take-off should track the extruder drive, not run on a fixed speed. Small mismatches accumulate into either sagging loops or tension spikes.
- Anti-stick surface. Sugar-sanded and high-moisture ropes need a belt that releases cleanly; a belt that grips will distort the cross-section before the surface sets.
- Straight run into cooling. Every bend between die and tunnel is a place where a soft rope can deform. Design the layout with the shortest, straightest path.
Changeover, cleaning and the real cost of variety
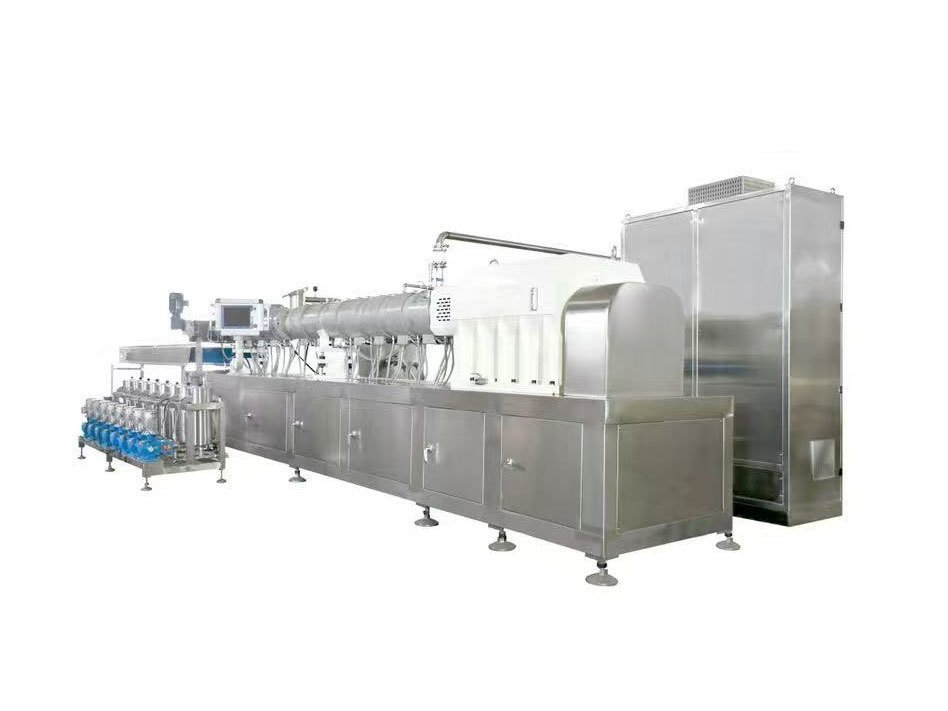
A machine’s usable product range is set by how long a changeover takes, not by how many dies are in the drawer. Ask for these numbers before you buy: die swap time with one operator, barrel flush time between colours, and the minimum batch that justifies a changeover. Machines that flush quickly and swap dies in minutes let you run small seasonal batches profitably; machines that need a full teardown push you towards long runs and large inventories.
Hygiene follows the same logic. Smooth internal surfaces, quick-release clamps and a barrel that drains completely are worth more in daily operation than any additional feature on the brochure. If the design hides product in a dead corner, someone will find it during an audit — or a customer will find it first.
Checklist before you specify an extruder
- Product list, with weights. Give the supplier every SKU you plan to run, in grams per piece, not just product families.
- Colour and filling plan. Decide now whether stripes or cores are on the roadmap — it changes the head specification.
- Die library. Ask which die families are included and what a new profile costs and takes to make.
- Temperature control. Confirm zone count, jacket medium and the stability the machine can hold in production, not in a lab.
- Changeover times. Get die swap and colour flush times in writing, then check them during acceptance.
- Line integration. The extruder must talk to the cooling conveyor and cutter drives; make sure the controls are specified as one system, which is how we configure every turnkey project.
Frequently asked questions
Can one extruder make both liquorice and gummy?
Usually yes, with different dies and recipes. Liquorice masses are stiffer and run cooler; gummy masses are more elastic. Check that the barrel’s temperature range and drive torque cover both before assuming one machine will do the work of two.
How many colours can a double-head machine run?
Two colours through one die is the standard configuration, which covers stripes, cores and marbled effects. Three or more colours need additional heads and a purpose-designed die block — specify it as a project, not an add-on.
Do I need a separate cutter?
The cutter is a separate unit, but it must be speed-linked to the extruder. Buying them as one package is almost always cheaper than integrating two suppliers’ controls afterwards.
What determines the maximum rope speed?
Product rheology and cooling capacity, not the motor. A rope that cannot set before the first bend will deform regardless of how fast the extruder can push it.
Specify the extruder around your products
Send us your product list with piece weights, colours and any filled or striped items, and we will come back with a head and die configuration, a capacity calculation and a straight comparison of single- versus double-head options. Start from our machinery range, or read the rainbow gummy line guide and the liquorice production line guide to see how extrusion fits the wider process. When you are ready, send your requirements and an engineer will reply within 24 hours.